As I promised, I’m posting a How To for installing Virtual Server on WHS.
A word to the wise:
I’ve a 2.8Ghz Celeron D with 2GB RAM to run this on. Virtual Server can provision processor usage to an extent, but it uses RAM like there’s no tomorrow. Don’t forget that it has to play nicely with WHS (specifically DEmigrator.exe that burns CPU cycles) and other stuff like defrag passes and anti-virus.
Since WHS is built on top of Small Business Server, the underlying OS is essentially the same. Hence no compatibility issues.
Installing Virtual Server is relatively straight forward.
First, download Virtual Server 2005 from here.
Then Download the Service Pack from here.
Open a Remote Desktop Session or use the Advanced Admin console tab to access the WHS desktop.
Now, its up to you whether you want to install the program files to C drive or D drive. Its worth noting that the Virtual Machines are stored separately in a location you specify on a per VM basis.
Once the install( including that of the service pack) is completed go to Start -> All Programs -> Microsoft Virtual server and hit the Administration Website shortcut.
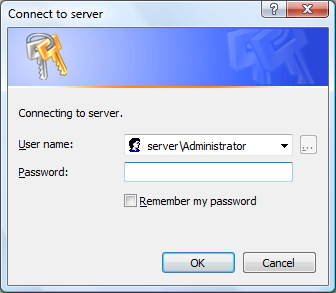
You get this:

Note: I was accessing this remotely so had to prefix the user name with “server\”.
Otherwise, these are your WHS credentials that you use to access the console or remote in to WHS.
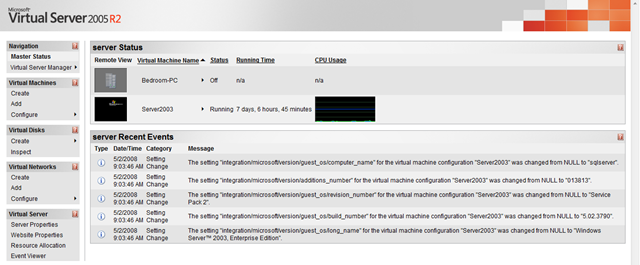
This is the webpage you get to (click for a larger version):

As you can see I have two virtual machines listed. One of which is currently running.
I find that its easier to manage the server remotely, so copy the web site shortcut from the Start Menu to a network share. This now allows you to reach the web site from any connected PC.
If you’ve done this, close Remote Desktop and try it. The Default IIS settings that the install configures for you should be OK.
Setting up a Virtual Machine couldn’t be simpler:
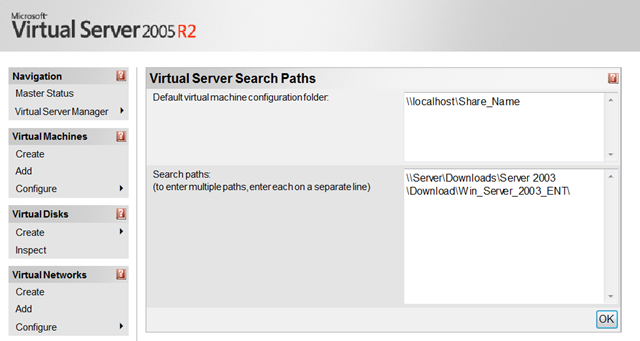
First we want to set the default location of our Virtual Machines. Go to Server Properties at the bottom of the Sidebar and click on Search Paths. Change the Default virtual machine configuration folder to your desired location. I’ve been using a network share with replication turned off.

You can also set default paths for ISO’s that you will use. These will show up when you configure the VM’s Cd/DVD drive.
And press Ok when you’re done.
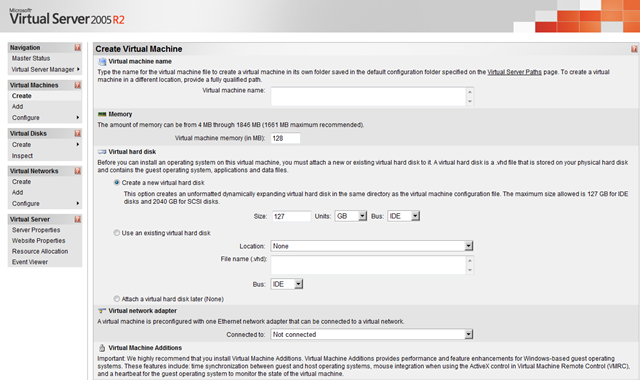
Hit Create under the Virtual machines section of the sidebar:

Enter all the info on the screen.
The RAM that the Virtual Machine is assigned is occupied as soon as the VM starts up. So be careful when doing this.
You have a choice of creating a new Virtual Hard Drive or attaching an existing one. make sure that the size of the hard drive is enough for your needs. Expanding it later can be a little difficult. And choose a SCSI bus if you intend to have multiple VHDs attached to the same machine.
The VHD actual file size increases as you add data to it. It stops at the logical size of the VHD. So a 80Gb VHD can no be larger than 80Gb on disk.
You can also choose to create the VM without an attached hard disk.
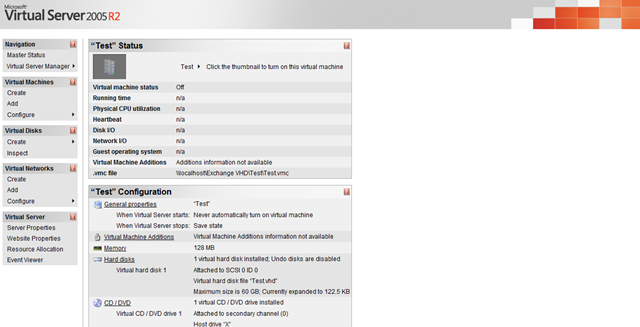
Pressing “create” takes us to the Vm config page:

You can also reach this page by selecting your VM from the Configure menu under the Virtual Machines Section of the Sidebar.
This is where you change items such as memory, hard disks, CD/DVD ROM drives, Networking, SCSI Adaptors, COM and LRP ports.
Each option takes you to a new page were you configure settings specific to that area.
Its worth noting here that the VM needs to be Shutdown for some operations. But you can still change the location of the media that the CD/DVD ROM drive captures while the VM is running.
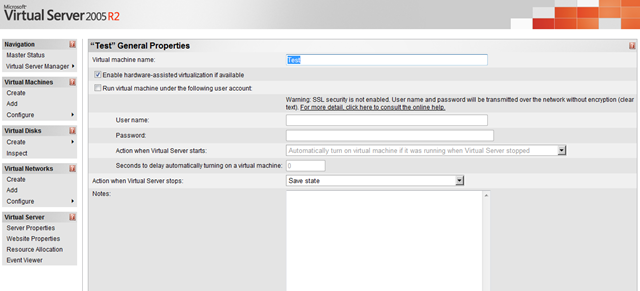
You can also set the VM to start up automatically with WHS by going to the Server properties.

With my Windows Server 2003 VM running constantly, the WHS automatic restarts could be a problem. All I do is check the box, input the account details, set a delay ( in my case, 600 seconds) and tell Virtual server to save the VM’s state when WHS shuts down. The delay is actually a pretty nifty feature as it allows WHS to initialise itself, bringing all its processes online, before starting the VM.
One more thing I have to cover for running this on WHS is Resource Allocation:

You’ll find it the bottom of the sidebar.
As you can see my VM has 50% Max Processor capacity to play with. This protects the WHS processes from being starved of resources.
Once you’ve got your VM set up and you’ve installed you software all you have to do is remote in using the Remote Control facility the web site provides you with ( its good for the initial setup such as enabling Remote desktop Connections and so forth). All you do is double click on the VM icon on the front page.
I also recommend installing VM Additions (the ISO for it comes with Virtual Server and is a default option for the CD/DVDROM drive) that will improve the way the VM behaves within the Virtual Server environment.
Additionally, this post probably scratches the surface of what’s possible with this.
And I’m sure I’ve got a few things (unintentionally) wrong along the way so its not fool proof, so YMMV ( Your Mileage May Vary).
Happy Hacking…


You must be logged in to post a comment.